A great cup of coffee on a relaxing morning surrounded by nature is one of life’s great, simple pleasures. Here’s everything you need to know.
At its most basic, coffee is merely ground coffee beans steeped in water.
Baristas out there, don’t jump down my throat!
But in that sense, making coffee is easy and can be done from almost anywhere. You only need a few basic components:
- Coffee grinder or pre-ground coffee
- Means of heating water
- Container in which to mix the two
I always use whole bean coffee and grind it myself, but if we’re being technical, the grinder and hot water aren’t actually necessary.
Because this is the Complete Guide to Camping Coffee, let’s look at a few different ways you can brew a cup of pick-me-up while enjoying the relaxing sights and sounds of Mother Nature.
Table Of Contents
7 Methods of Making Coffee While Camping
Coffee is a camping essential — at least when I go.
These aren’t the only ways of making coffee while camping, but these are the 7 most common ways of making camping coffee.
Camping Cold Brew Coffee
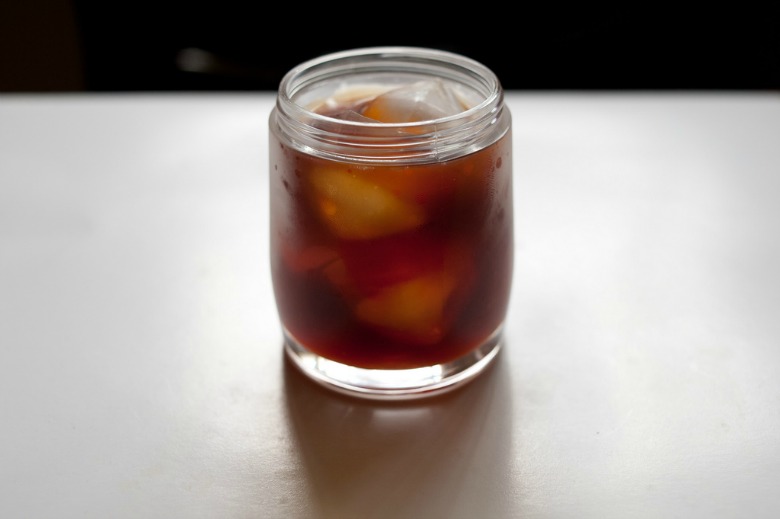
Cold brew coffee has gained popularity over the last few years as chains like Starbucks began to add it to their menus.
If you’ve never made cold brew coffee, it’s incredibly easy to do.
How to Make Camping Cold Brew Coffee
- Grind coffee beans to a coarse consistency. It should look like loose leaf tea.
- Put the ground coffee in a cheesecloth bag or similar. I actually use a paint strainer bag!
- Put the bag in a large pitcher.
- Add cold water
- Let it sit for 14-18 hours at room temperature
- Dilute to taste and enjoy!
No fancy coffee grinder and no hot water is required. It’s perfect for a great cup of iced coffee while camping!.
I like to combine 12 oz of coffee beans with 64 fl oz of water. Because 1 fl oz of water weighs almost exactly 1 oz, that’s a 5.3:1 ratio by weight. After steeping for 14-18 hours, dilute to taste at approximately a 1:1 ratio with iced water or your milk of choice.
The beauty of cold brew coffee is you can set up your campsite, prep your cold brew, and then enjoy it the next morning with no work needed!
Cowboy Camping Coffee
For those who want a hot cup of coffee without the hassle of straining or filtering your grounds, cowboy coffee might be for you.
Essentially, cowboy coffee is like any other cup of coffee except that ground coffee and water are boiled together in a single pot and are not strained.
To most, this sounds like it would create a thick, sludgy cup of Joe swimming with chewy spent coffee grounds.
But when done properly, this shouldn’t be the case.
Have you ever had a great French Press coffee? You probably remember how rich, flavorful, and full-bodied it was.
That is what a great cup of cowboy coffee tastes like.
How is cowboy coffee made? It’s not that hard.
How to Make Cowboy Coffee
- Combine ground coffee and water in a pot, preferably with a spout like a teapot.
- Put the pot over the heat source. A campfire is perfect!
- Let it get to a strong rolling boil.
- Remove the pot from the heat source.
- Pour cold water down the spout to cease extraction and settle the grounds.
- Let the pot sit for around a minute.
- Gently pour yourself a cup, doing your best to leave the grounds behind at the bottom of the pot.
Cowboy coffee can be made in any serving size, but I think it’s best when made in large batches for everyone to enjoy.
I’d recommend you use whatever ratio of ground coffee you normally enjoy in a cup, but then subtract a little water because you’ll want to add this in the “pour cold water” step above.
Generally 2 tablespoons of coffee per 8 fl oz of water is a good cup, so I’d say go with about 2 tablespoons of coffee for every 6-7 fl oz of water in your pot with the other 1-2 fl oz reserved for the cold pour step.
Cowboy coffee ain’t just for dirty, rough-and-tough cowboys.
I’m an advocate of “try anything twice” — once to see if you like it and a second time to confirm — so if you’ve never tried cowboy coffee, give it a go on your next camping trip.
Camping Coffee Percolator
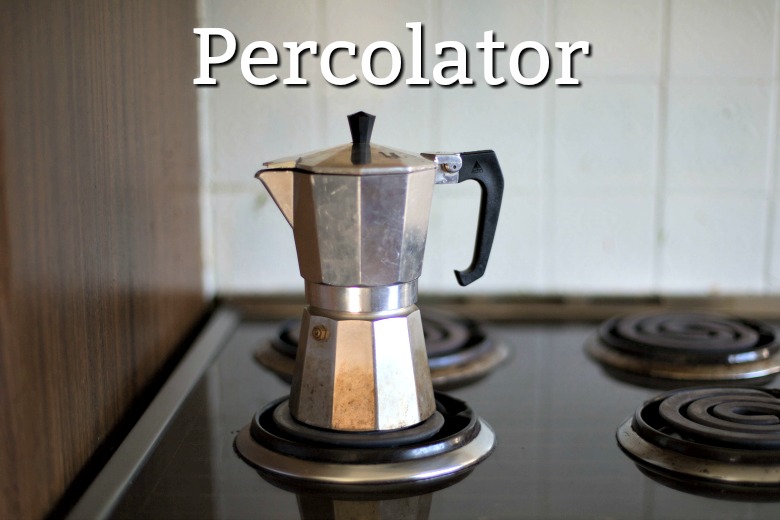
First, we may have to answer the following question: What is a percolator?
And maybe even more basic, what is percolating?
Webster’s Dictionary defined “percolating” as…
Just kidding.
Percolators are awesome for camping for three reasons:
- They’re entirely self-contained.
- The coffee grounds are elevated so they aren’t scalded by the fire.
- They have no single-use components, such as paper filters.
Check out this great video by Howcast about how to use a camping coffee percolator.
A camping coffee percolator with a strong stainless steel exterior will hold up well with repeated use. Even in the video above they’re inserting that thing directly into the fire pit, though off to the side and not directly in the flames.
Pros to Percolators
- Can brew large quantities for 4-6 people.
- Can be immersed directly in the fire pit or over the campfire.
- Makes a concentrated cup.
- No electricity needed.
Cons to Percolators
- Requires coarsely ground coffee.
- Even with proper grind, grounds sometimes end up in your cup.
- Some subtleties of the roast can be lost.
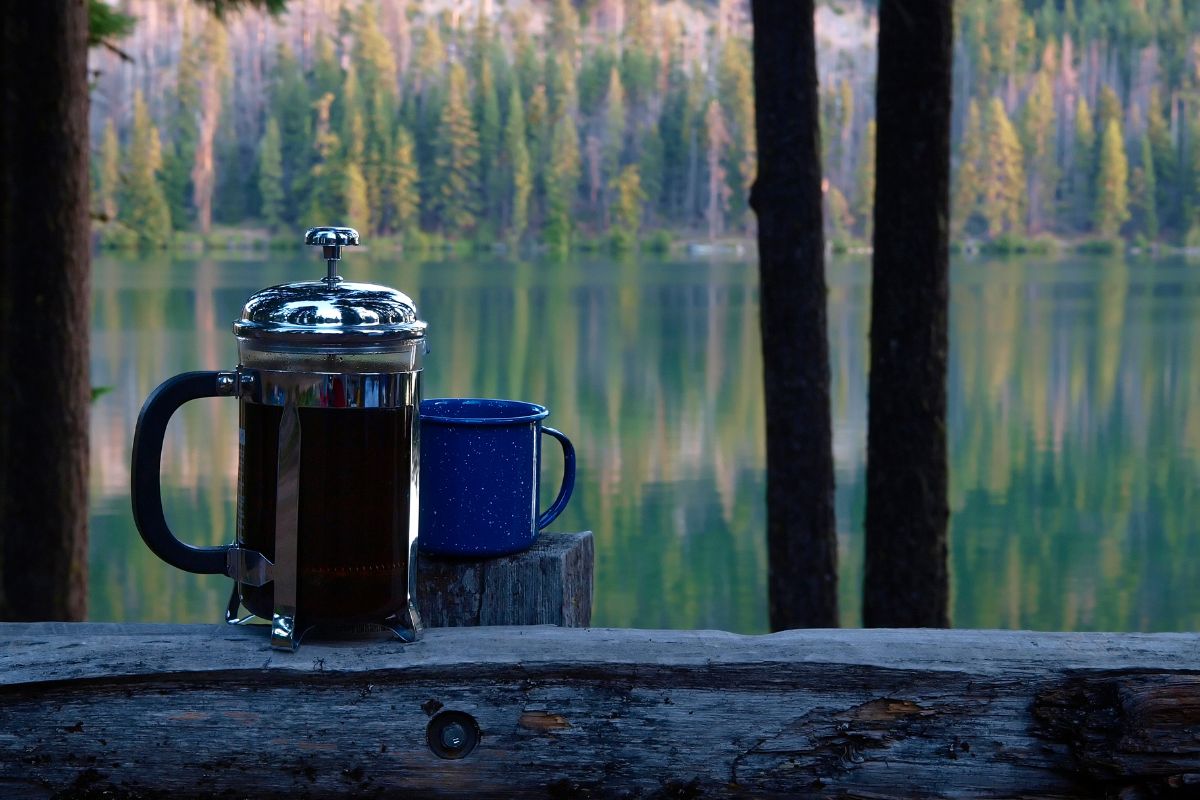
Camping French Press Coffee
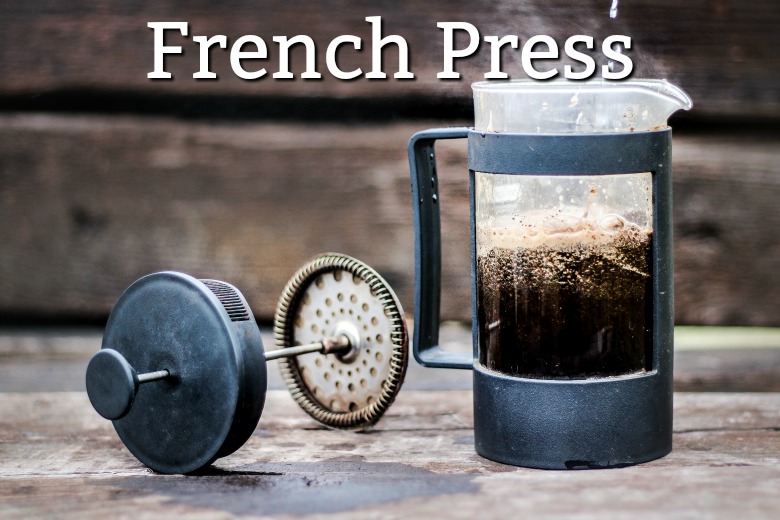
French Press coffee is often described as “muddy” because coffee is poured straight from the canister without being strained through a fine paper filter.
(Their metal mesh filters allow some fine coffee grounds to sneak through.)
As a result, the coffee you get from a French Press can often be thicker and sludgier than that from a typical drip coffee machine.
That, however, is by design!
French Press coffee makers don’t require any single use paper filters, instead using the included plunger to separate the spent grounds from the brewed coffee. This makes French Press coffee great while camping — there’s almost no cleanup and no supplies are really needed.
Pros to French Press
- Can make multiple servings for multiple people (or all for yourself).
- Creates a complex, flavorful cup of coffee.
- No electricity needed.
Cons to French Press
- Thicker, muddier coffee (which can be a pro if that’s your thing).
- Requires you to heat water separately.
Camping Drip Coffee Maker
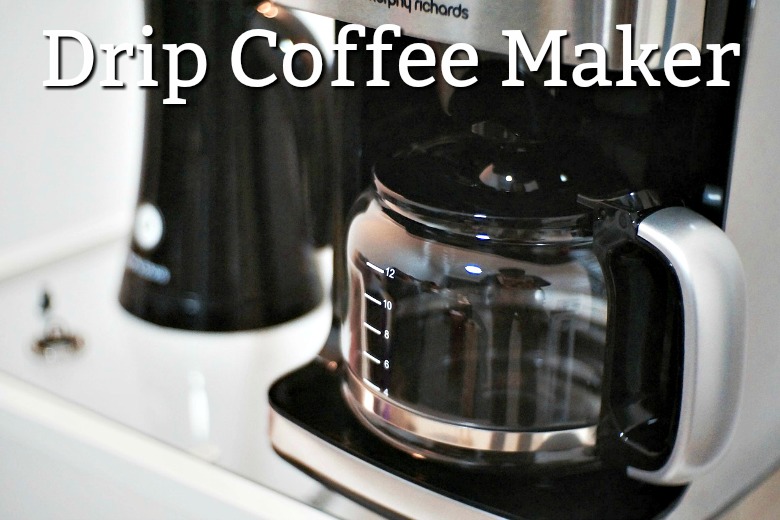
All of the camping coffee making methods mentioned thus far are great for those looking to unplug, by which I literally mean have no access to electricity.
That may not be you!
If you’re the kind that likes to run your generator and enjoy some of the finer comforts of home — here in Hawaii there are a lot of weekend beach campers that run nearly complete kitchen setups while camping — then you may want to look for a camping drip coffee maker.
Companies like Coleman make their own rugged coffee makers intended for use in the wilderness.
(Whatever “wilderness” means to you.)
Pros to Drip Coffee Makers
- Serves multiple people.
- Makes a bright, clean, flavorful cup of coffee.
- No need to heat water separately.
Cons to Drip Coffee Makers
- Fairly bulky.
- Requires electricity.
AeroPress Camping Coffee
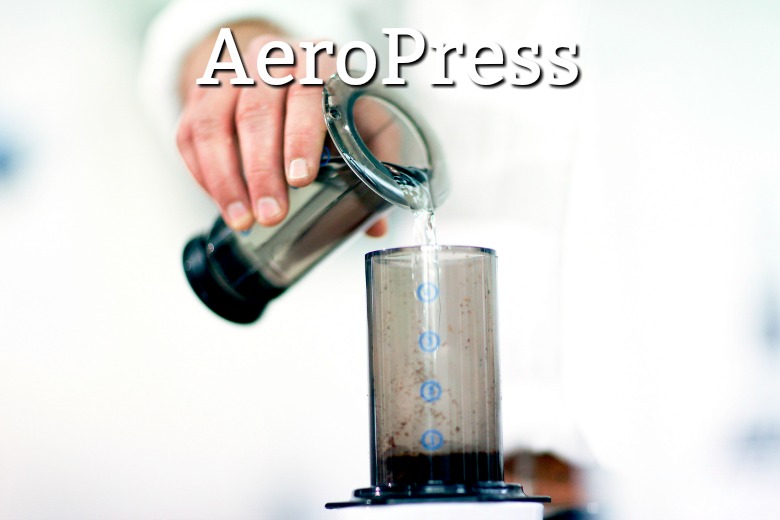
I love the AeroPress system.
It’s usually my go-to method of making coffee while at home, and it’s still one of my preferred ways of making coffee while camping.
The pros to using an AeroPress are listed below, but I really want to accentuate one of them:
The AeroPress is light, compact, and nearly indestructible.
Seriously, it weighs like 10 oz, is only like 6″ long, and is made of durable, BPA-free polypropylene plastic. It comes with micro-fine, single-use paper filters, but I switched those out for a reusable stainless steel filter.
Did You Know? Paper filters absorb some of the flavorful oils extracted from freshly ground coffee beans whereas the stainless steel filter lets them flow freely into my cup to be savored.
If you’ve never used an AeroPress before, check out this video.
The plunging process puts a little pressure on the coffee and water mixture, producing a more concentrated cup. You can either dilute with water or milk to taste, or, if you’re like me, enjoy it straight and strong!
Pros to AeroPress
- The easiest way to get a bright, flavorful, clean cup of coffee while camping.
- Capable of making a strong cup.
- Compact and nearly indestructible.
- No electricity needed.
Cons to AeroPress
- Single serve only.
- More complex and precise to use.
- Requires you to heat water separately.
Camping Espresso
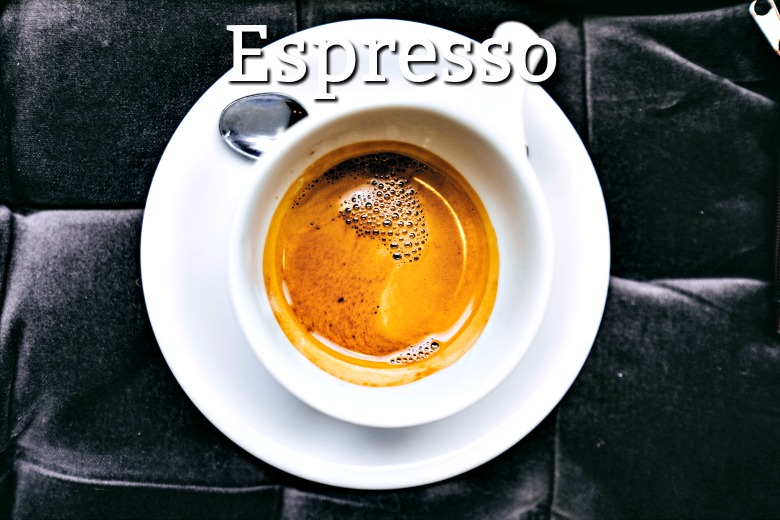
Just because you’re off the grid doesn’t mean you need to find a nearby coffee shop to get your espresso fix.
Check out the MiniPresso by Wacoco!
The MiniPresso is a mini, hand-held espresso machine and comes in two versions:
- MiniPresso GR: Uses ground coffee
- MiniPresso NS: Uses Nespresso OriginalLine compatible capsules
Now, before you jump down my throat, yes, I realize that the MiniPresso isn’t capable of making true espresso.
What do I mean by true espresso?
Espresso is defined by the process used to brew it. Specifically, you need to adhere to the following criteria:
- 200ºF water temperature
- 9 bars of pressure during extraction
- 25-30 seconds of extraction time
You will not be generating 9 bars of pressure with the MiniPresso’s hand-held pumping system. You’ll actually generate like 2 bars.
But you know what?
That’s sufficient to make a concentrated coffee that reasonably approximates espresso.
If you need your fix while in the forest, it’s either that or to rejoin society to find a nearby coffee shop.
I know which option I’m choosing.
Pros to Camping Espresso
- Concentrated caffeine.
- Compact and portable if you use the MiniPresso.
- No electricity needed if you use the MiniPresso.
Cons to Camping Espresso
- Single serve only. And even then, small volumes.
- Not true espresso.
- Requires you to heat water separately.
Tips for How to Make Coffee While Camping (Only Better)
I need coffee every morning, but I know the difference between adequate coffee and great coffee.
Go ahead, call me a snob.
Controlling variables and dialing in a great cup of coffee or espresso can be challenging enough at home, so doing it while camping adds another layer of complexity.
Here are some tips you can try to employ as you learn how to make coffee while camping.
Use Premium Coffee Beans
Life is too short to drink bad coffee. And since I go camping to enjoy myself, why would I want to spend my most cherised free time drinking something I don’t enjoy?
I personally buy coffee beans online from a local specialty coffee beans roaster, but even if you get beans at your local grocer, I strongly recommend getting whole beans and then grinding them yourself.
Do NOT use pre-ground coffee
Babbie’s Rule of 15s states the following:
- Roast green coffee beans within 15 months of harvesting.
- Grind within 15 days of roasting.
- Brew within 15 minutes of grinding.
- Drink within 15 seconds of brewing (for espresso).
See the one I italicized there? That’s the one we care about. Ground coffee begins to go stale within 15 minutes of grinding.
Crazy, right?!
One of the easiest ways you can improve your coffee is to grind immediately before brewing. That store bought pre-ground coffee just won’t make a great cup.
If you’re serious about coffee, a good coffee grinder is a necessity for your kitchen. But while camping that’s impractical.
However, a serviceable manual coffee grinder will do in a pinch. It takes a couple minutes to grind up enough coffee for a single cup, but it’s well worth the time you spend doing it.
(Just make sure you have your friends and family do the grinding for their cups.)
Use stainless steel filters
This tip is an either-or depending on your preferences, both in terms of convenience and coffee flavor.
What do I mean?
There’s no doubt that multi-use stainless steel coffee filters are more convenient to use. Just rinse and reuse.
However, metal filters just don’t have the same fineness as paper filters, which have micro-sized filtering capability to give you a clean cup with absolutely zero particulate ground coffee matter. Metal filters often let the tiniest fine grains slip through, which results in a muddier, richer cup.
But that cup is often more flavorful because a downside of paper filters is they also absorb some of the flavorful organic acids that make a cup of coffee truly great!
Those African roasts I mentioned above? They’re best enjoyed with metal filters — in my opinion.

Set up a coffee making station
I can’t tell you how many times my lack of forethought has led to me balancing my coffee gear on a rock to get it off the dirt. Depending on your preferred method of making coffee, it may benefit you to have a dedicated work station with everything you’ll need:
- Whole bean coffee
- Manual coffee grinder (see the first tip above!)
- Coffee maker of choice
- Pot/kettle of hot water
- Coffee mug
- A spoon or two
- Probably some type of towel or napkins
A little forethought can streamline your process.
Why is this so important to me?
I hate over-extracted coffee! My favorite coffees come from Ethiopia and Kenya, and I love them for their bright, fruity, aromatic qualities.
Recommendation: If you’re looking for a great African coffee, I’d recommend Stone Street’s Ethiopian Yirgacheffe or Rockbern’s Kenyan AA Coffee. You’re welcome!
When I’m not organized, sometimes I let my coffee extract for too long. That means it over-extracts and pulls out too many bitter organic acids. Those bright, fruity, aromatic qualities of my favorite African roasts? They totally get overpowered by the bitterness.
Pre-heat your mug
Coffee cools off quickly, especially if you like to enjoy it in smaller quantities. But while much of that heat is being lost to the air, even more of it could be getting lost to your coffee mug!
Pour a little hot water into your mug before pouring in your coffee and enjoy a morning cup that stay hotter longer.
(Just don’t forget to empty the cup before pouring in your coffee.)
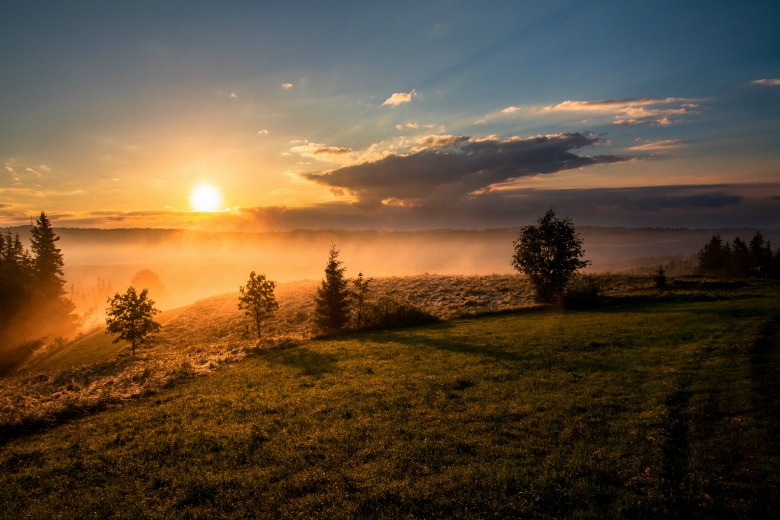
Find a relaxing place to enjoy your coffee while watching the sunrise
Let’s not lose sight of why you’re camping in the first place: To enjoy the spectacle that is the world around us.
Stoke your fire, heat your water, make a delicious cup from freshly ground coffee beans, and then find a cozy spot with a view of the sunrise.
No matter what camping coffee brewing method you employ, this may be the most important tip of all.
Want to share how to make coffee while camping based on your experiences? Comment below!